Migrating my blog to a new home! All old content will still be over there, plus new posts!

Sunday, August 22, 2010
Go!
Of late there have been a lot of GO! AccuQuilt cutters being given away on the internets. I would love to win one, and you probably would too, so GO! enter!
 |
| Enter here! |
Connecting Threads
I was browsing the 3x6 Bee group and saw rsislandcrafts awesome blocks.
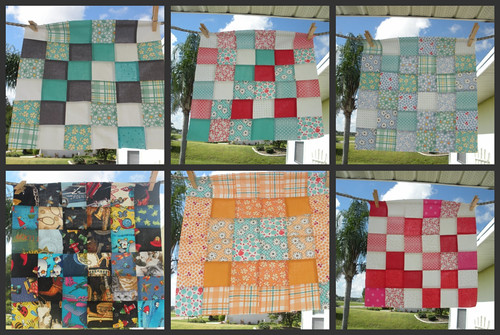
photo belongs to rsislandcrafts
Aren't they great?? Anyways, I am especially digging the fabrics, which apparently come from the Canning Collection. I had never heard of it, had you? If you had, why didn't you tell me?!
This collection can be found over at Connecting Threads. The prices are really reasonable!! And they have cute quilt kits too!! Look at all these exclamations! I'm so excited!!
Here are some of their collections:


Canning Day. FQ pack $31.24. Quilt Kit (one of many) $34.56


And just to seal the deal of awesome, they have coordinating thread for each collection.
Sunday, August 15, 2010
Dress
Look at my Evening Empire dress (pattern by Anna Maria Horner)! This is Option B.
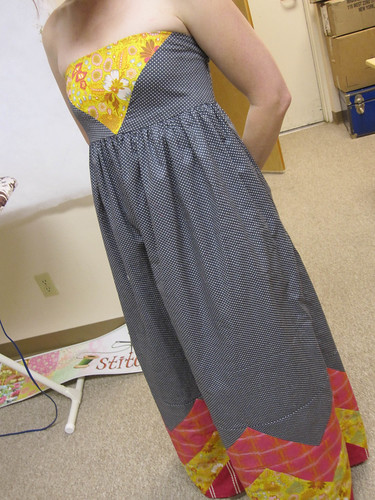
This pattern was a DREAM. It took me 6 days (mostly evenings).
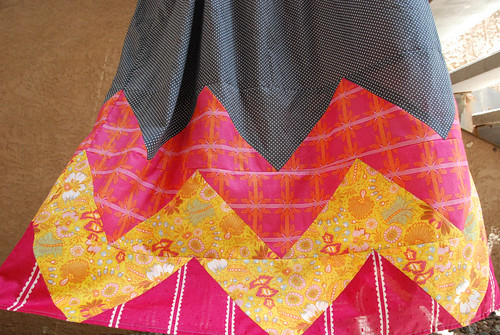
Fabric
The yellow and pink fabrics are Anna Maria Horner. The bottom one is a pink dobby dot from the Pastry line collection, the other 2 are Little Folks voile. The grey & while polka dot is like a lawn that I bought in Costa Rica. The pink lining was so discount fabric from Hancock, and I'm not sure what the exact fiber content is (mostly cotton from the feel). I was hesitant about sewing with such light fabric, but it went really well. I pinned more than I usually would, but I was also more careful than usual because I wanted it to turn out well.
Pattern
I did NOT cut out the pieces. I used tracing paper and a tracing wheel to make cardstock templates of the smaller pieces, and traced directly onto the fabric for the skirt front & back pieces.
I'm mostly a quilter, so I used my ruler & rotary cutter for EVERYTHING.
Sewing
I did this project bit by bit. One night I cut out pieces.
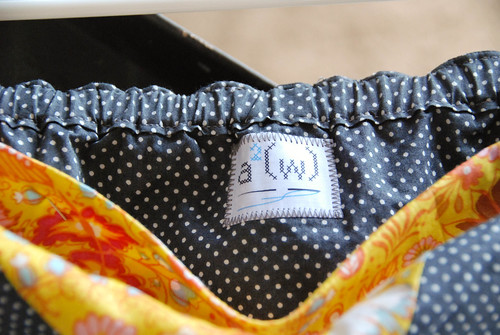
The next night I sewed the bodice. I opted for the elastic on the back and am SO GLAD that I did. The directions were a bit confusing with left & right, but the accompanying diagrams answered all of my questions.
Then the zigzags & skirt front (& next day zigzags & skirt back). HERE ARE MY 2 ALTERATIONS. When I sewed the rows of zigzags to the skirt front, I used a 3/8" seam allowance, as opposed to the 5/8" specified. I tried 5/8" and ripped it out because my peaks were cut off. 3/8" worked for all the rows. And when I sewed the front to back, I used the specified 5/8" allowance and everything lined up perfectly. I also SHORTENED the dress 2" (I'm about 5'3").
Gathering the skirt went so much easier than I expected, the directions were clear and easy to follow. At this point it all started to come together and I couldn't wait to finish. But I did, because slow & steady gets and awesome dress.
Finally it was time to finish. The invisible zipper directions are AMAZING. No need for a special foot (just a zipper foot). Sewing in the zipper to the outer & lining was a bit confusing, but again, the diagrams really made it easy to understand.


The cons
This dress is not made for small people. I made an XS, took in the side seams, and the top is still HUGE. I'm a 32A, so granted there isn't much there to hold things up, but still. I am SO GLAD that I added the elastic. The back is really cinched in, but it doesn't look bad when the dress is on because of all the gathering at the waist.
That's the only con...
baking fail and fresh food
I used to be an awesome baker. Used to be. I can't bake to save my life. Every cake I make fails somehow, either it falls (because of altitude), or sticks to the pan...
So in happier news, I re-joined the local CSA. While the 100-mile diet won't work for us (does it work for anyone outside California??), we are going to try the adjoining state diet. I'm pretty excited!
I've also been trying my hand at gardening. We live in an apartment so everything is in pots. Today I transplanted everything into bigger pots since it is all doing so well! Hopefully it will last. I think tonight's rain should help.


And it just realized that I didn't take a picture of Basil Pesto!! Jeez. He's delicate and lives mostly indoors. The heat is just too much.
I've also been trying my hand at gardening. We live in an apartment so everything is in pots. Today I transplanted everything into bigger pots since it is all doing so well! Hopefully it will last. I think tonight's rain should help.

Mojito, my prolific mint plant. He's been with us the longest.

Strawberry. She already produced 6 berries and is now on her second set this season!

Chive is Josh's favorite because it's the underdog. It was previously overrun by Mojito & Strawberry and JUST got it's own pot today!

Lavender McDade. I'm pretty excited about having fresh lavender around to make things smell & taste yummy.
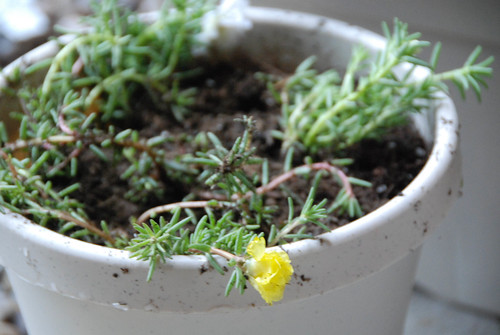
Rose Moss. We just got her today, so no name yet. This is our only decorative plant!
And it just realized that I didn't take a picture of Basil Pesto!! Jeez. He's delicate and lives mostly indoors. The heat is just too much.
Friday, August 13, 2010
I WON!!!
So, for the first time EVER, I won a blog giveaway. I know, it totally made my very boring school day.
Evelyn from Use the Loot very generously hosted a giveaway for a charm pack of 70 6" vintage linen squares. 70!! I never find cute sheets around my thrift stores, so I am totally stoked! I can't wait to get squares and put something together!
You should check out her blog AND this crazy awesome quilt.

I'm so happy! :)
Tuesday, August 10, 2010
Advice from quilters needed!
I live in an apartment. It's fairly large, but ALL CARPET. I loathe carpet as it is, but it means that I don't have a hard surface for basting a quilt. We bought 2 pieces of 4'x8' MDF, put a hinge in the middle of each sheet so that it would store smaller, but they are HUGE and HEAVY to pull out & put away. It also means that I have to clear out the living room to use. Not a great solution.
Then I went and used a long arm machine & saw the roller system. Genius!! Also, fun. I kept thinking that the long arm can't do straight lines well though (I tried), and can't follow seams like I could on my machine with a walking foot. But I wanted to take my quilts there for basting purposes...
So, maybe I can buy my own roller quilting frame? I'm considering a few options and need help.
1) $10 plans to build my own frame. No clue how hard to source the gears would be, or how expensive the the supplies would be. But I am very handy, so the idea of building isn't an issue. Does it fold flat for storage?

2) $69 kit to build a frame. This look like it has plans for the above frame, but include some parts, like the gears. I would still have to source lumber & a few other parts. Does it fold flat for storage?

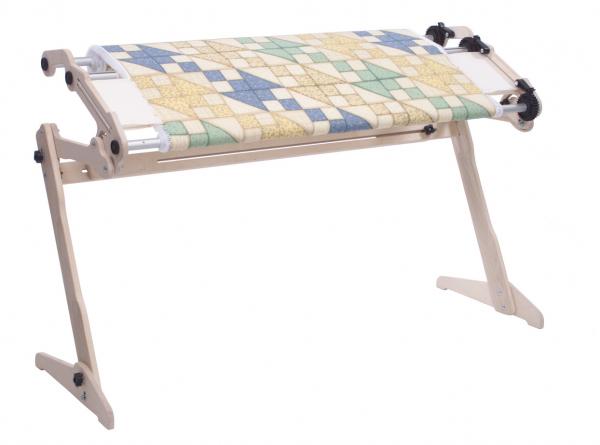
3) $199 pre-made stand. Folds flat, adjustable width. I could use this for basting, or for hand quilting. Seems pretty nice. The reviews I've read say that the only negatives are assembly, which isn't a problem for me. And from the Grace website, it looks like you can fold it up with a quilt still on it. I also found it on Ebay with free shipping.
4) Fan Frame. I don't know how easy it would be to use, but it looks fairly straight-forward. And it definitely stores flat! $132, so it's a little less than the previous option.

5) Save up for a more professional stand that can accommodate a long arm machine. This is a 2-parter, since I need to save up for the machine AND the stand, so we're talking thousands of dollars and years. And I don't think those store flat. So maybe I just convinced myself out of this option?
What should I do?!?! The basting/sandwich is my main issue. My machine is more than adequate for quilting purposes at this time. Please, ask around if you know someone who has knowledge about this. Thank you!
**All photos are taken from the linked website**
San Diego
I went to San Diego 2 weeks ago for a work conference. Our school is adopting the AVID program, which is aimed at getting the middle-level kids organized and college-bound.
Anyways, I went with 6 other teachers and our principal (who all rock, they are young, not old-stick-in-the-mud people). While the trainings were dull and standard, we had great fun exploring in the evening.
Some pictures from our trip. (All are SOOC from a Canon Powershot)
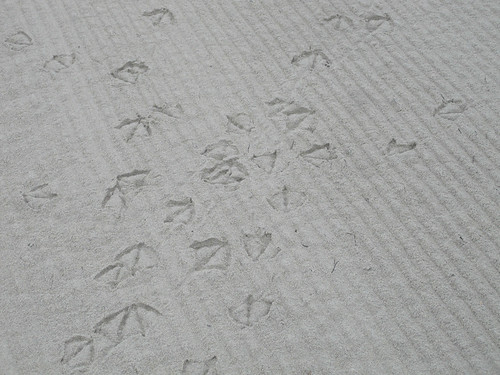


(yes, it was cold the entire time we were there!)


Wednesday, August 4, 2010

Tuesday, July 20, 2010
I can't stand it
I'm tearing apart my sewing room hoping to get it under control.
It is a huge undertaking.
:(
It is a huge undertaking.
:(
Feeling funky
I FINALLY finished my July bee blocks. I realize it's not really late, but I got the fabric in June, so I've had it for a while.
Full disclosure: I had NO desire to make these blocks. The idea seemed fussy and not my style. I don't have a house, I have an apartment, and I hate it. My biggest wish is that I had a house of my own, so this block kinda rubbed in my face that I didn't have a house of my own to base the block off of. Also, I went to school to be an architect, so I have very rigid ideas about how drawing, models, and sewn models (?) should be. It was very hard to translate my sketches into fabric. Also, I was short fabric. Well, I had leftover, but the designs I wanted to use the most were the small pieces. :( Lots of extra piecing to make the fabric stretch.
Ok, b*tching over. I sucked it up this morning and just made a go of it.
And you know what? It wasn't as bad as I had built it up to be in my head. My house block is based off of the house I grew up in. And while it isn't perfect, I think it came out pretty good. And my person block - LOVE. I don't want to send it off!! I had no idea how much fun the person block would be! I want to make more. Maybe one of me & the boy holding hands? LOVE the person block. Who knew it would be so much fun? I added yellow from my stash since I didn't get any in my packet, but it wouldn't be me without yellow.
Oh, you want to see the blocks? Of course!


Sunday, July 18, 2010
The couch!!
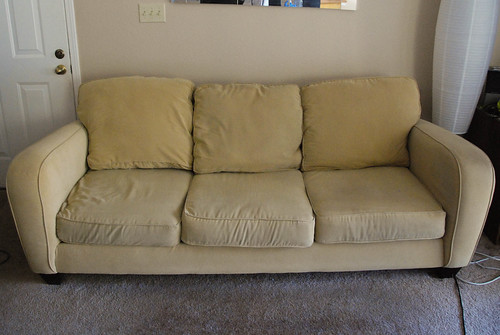
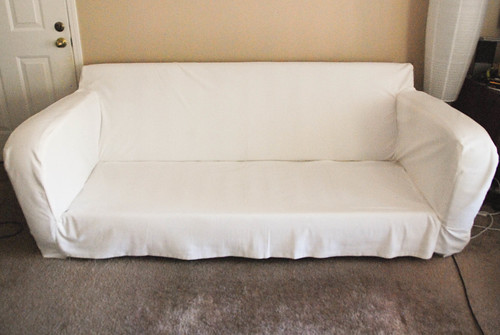
Before
It's dingy, and the cushions were deformed. I think there was a permanent butt imprint. You can just trust me on this, no close-ups!

During
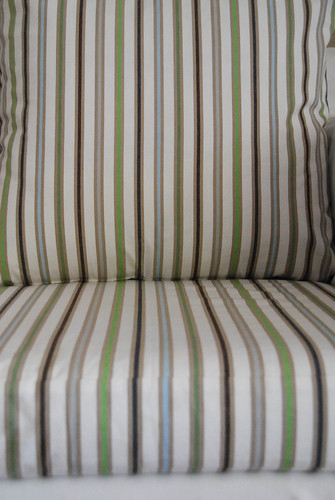
Phase 1: Covering the body. The white is from Ikea and I used about 6 yards. I did this back in May (??). It needs to be washed. And hemmed.


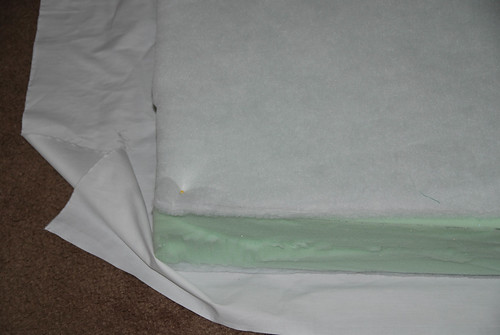
Next I remade the cushions. 4" foam, batting, and a white muslin cover sewed on. I just made 2 long cushions instead of 3. I was going to do the back the same way, but I didn't think it would look right. So I bought 3 24" square cushions from Hancock. They were the right height, but too narrow. So I went back for 3 27" square pillows. These were too tall. So when I made the cases, I cut them 25" x 28" and just squished the pillow in (not a problem at all).


After:
If you are ever at Ikea buying fabric to recover your couch, you should not let this conversation happen:
Me: I want to cover it in white.
Boy: No, it will get too dirty.
Me: But you can wash it.
Boy: No, I don't want to worry about being messy.
Me: Fine, which one do you like
* Here is the important part *
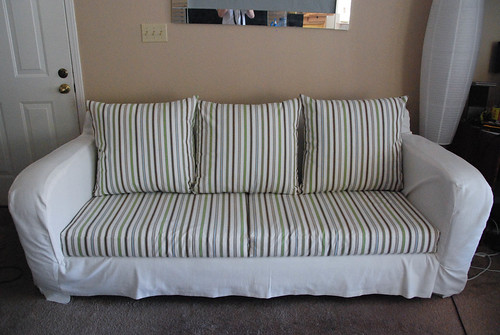
Boy: How about this one?
* If he points to stripes say NOOO. Unless you have lots of time, are a perfectionist, and like tedious sewing.
So here it is!


It turns out, after looking at these pictures, that I don't actually like it. But that's the good thing about slipcovers, right? As soon as I have the right fabric & energy, I can easily make a new cover. I have templates to use now!!
It's dingy, and the cushions were deformed. I think there was a permanent butt imprint. You can just trust me on this, no close-ups!
During
Phase 1: Covering the body. The white is from Ikea and I used about 6 yards. I did this back in May (??). It needs to be washed. And hemmed.

Next I remade the cushions. 4" foam, batting, and a white muslin cover sewed on. I just made 2 long cushions instead of 3. I was going to do the back the same way, but I didn't think it would look right. So I bought 3 24" square cushions from Hancock. They were the right height, but too narrow. So I went back for 3 27" square pillows. These were too tall. So when I made the cases, I cut them 25" x 28" and just squished the pillow in (not a problem at all).
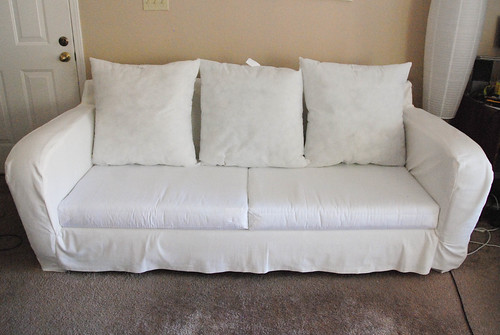

After:
If you are ever at Ikea buying fabric to recover your couch, you should not let this conversation happen:
Me: I want to cover it in white.
Boy: No, it will get too dirty.
Me: But you can wash it.
Boy: No, I don't want to worry about being messy.
Me: Fine, which one do you like
* Here is the important part *
Boy: How about this one?
* If he points to stripes say NOOO. Unless you have lots of time, are a perfectionist, and like tedious sewing.
So here it is!

Saturday, July 17, 2010
Late night
When the boy is away, I do things around the apartment. Late at night. So pictures are either flash-tastic, or dark. Maybe I'll show you the new bedroom look sometime.
I started slip-covering the couch in May, and am getting closer! The cushions were gross & squished, so I'm redoing the cushions. I'm sewing a white cover onto the foam, and will then put on a "pillowcase" cover that I can wash. That way the foam stays protected. Overkill, maybe, but seriously, those old cushions were gross.


 The body of the couch was covered in white back in May (and is due for a washing!!). You can see my tools and 1 cushion done. I went from 3 cushions to 2, because it looks more modern & sleek.
Also, I am not getting involved with piping!
I started slip-covering the couch in May, and am getting closer! The cushions were gross & squished, so I'm redoing the cushions. I'm sewing a white cover onto the foam, and will then put on a "pillowcase" cover that I can wash. That way the foam stays protected. Overkill, maybe, but seriously, those old cushions were gross.
Bleached muslin (Kona, 90", I bought a bolt when I had a 50% off coupon...this used about 1.5 yards, so $4.50), batting (bought today with a 50% off coupon, $10), foam (bought in June with a 50% off coupon, $40)

pinning it all together, wrapped the corners like a present
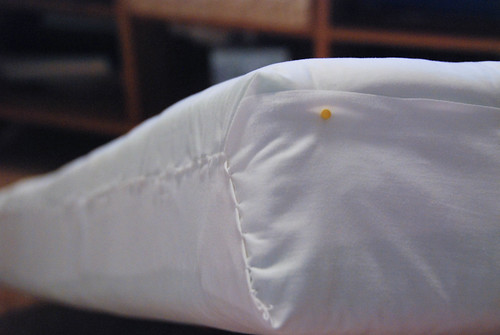
hand stitching. Sloppy, but this is an underlayer

Also, I am not getting involved with piping!
Subscribe to:
Posts (Atom)